How to Do Cypress E2E Tests in React
Introduction
Cypress is an open-source test automation tool that simplifies testing for various web applications. With Cypress, we can perform a range of testing types, including End-to-End (E2E) tests, Component tests, Integration tests, Unit tests, API tests, and Accessibility tests. End-to-end testing with Cypress is significant because of its user-friendly features, such as its speed, ease of setup, and built-in debugging capabilities, making it an efficient choice for validating the overall functionality and performance of modern web applications.
Cypress can test any application that runs in a web browser, including modern JavaScript frameworks like React, Angular, and Vue and older server-rendered pages. Cypress test development utilizes Mocha's syntax to create effective test cases, emphasizing key constructs essential for successfully developing tests with Cypress.
For React.js developers, Cypress is a game-changer because it provides an easy-to-use interface, fast feedback loops, and rich debugging tools. This blog explores how to use Cypress for E2E testing in React.js applications. Whether you’re new to testing or just getting started with Cypress, this guide has you covered.
What is Cypress?
Cypress is a JavaScript-based testing framework used for E2E testing. Unlike other tools, it runs in the same environment as your application, making tests faster and more reliable. It also has a built-in dashboard that makes test results easy to analyze.
What is E2E Testing?
E2E (End-to-End) testing examines the entire application workflow, ensuring all parts of the system work together as expected. It simulates a real user interacting with the app from start to finish, testing the flow across different components and modules.
E2E testing focuses on the entire application workflow, which involves multiple components, systems, and dependencies working together. Unlike unit tests, which are isolated and test individual functions or components, E2E tests verify how the application's different parts interact in a real-world scenario.
For example, in a web application, E2E testing might check:
The user interface (UI) for clicking buttons or filling out forms.
Communication with the backend, like sending data to APIs or fetching data from a database.
The final output or result, such as a confirmation message or a page update.
Since E2E testing simulates the user experience, it depends on the full application environment, including external systems like APIs, databases, and third-party services. This is why it’s a holistic approach rather than an isolated one.
What is Difference Between E2E and Component Testing ?
End-to-End (E2E) testing and component testing are crucial methodologies in ensuring the functionality and reliability of a React.js application, but they target different aspects of the software. E2E testing validates the entire user journey by simulating real-world interactions, such as filling out forms, navigating between pages, or interacting with APIs. It ensures that all components, APIs, and services work cohesively, providing confidence that the application meets user expectations.
Component testing, on the other hand, focuses on the functionality of individual React components in isolation. It tests specific behaviors, such as rendering a button with the correct label or triggering events like clicks. This method helps developers identify and fix issues at the granular level before they impact the larger application.
By combining E2E and component testing, you can ensure a seamless user experience while maintaining robust, bug-free components. This dual approach enhances software quality and builds trust in your testing strategy.
Why Choose Cypress for React.js?
Simple Setup: Cypress is easy to install and configure in React projects.
Real-time Feedback: See test results instantly in the browser.
Readable Syntax: Write tests in plain JavaScript, making it beginner-friendly.
Built-in Features: Includes automatic waiting, time travel debugging, and network request stubbing.
Setting Up Cypress in a React.js Project
Before diving into Cypress testing, it's essential to set up the environment properly. Start by ensuring that Node.js and npm (Node Package Manager) are installed on your machine, as these are prerequisites for integrating Cypress into your React application.
If Node.js isn't installed yet, you can easily download it from the official website. Once installed, you'll be ready to begin setting up Cypress. Below are the steps to get Cypress running within your React project.
1)Create a React Project
To kickstart your React project using Vite, run the following command:
npm create vite@latest testing-project1 --template reactThis will create a new React project in a folder named testing-project1 using the default React template.
After creating the project, navigate into the created project directory by typing cd testing-project1 .
Finally, run npm install to install the necessary dependencies. After that, use npm run dev to launch your project.
Your React project will be hosted locally by Vite at http://localhost:5173/ . Open this link in your browser to view your project in action.
Remove the unnecessary index.css file from your project and delete its import statement from the main.jsx file.
Modify App.jsx file
import React, { useState } from 'react';
import './App.css';

const RegistrationForm = () => {
  const [formData, setFormData] = useState({
    name: '',
    email: '',
    password: ''
  });

  const handleChange = (e) => {
    const { name, value } = e.target;
    setFormData(prevState => ({
      ...prevState,
      [name]: value
    }));
  };

  const handleSubmit = (e) => {
    e.preventDefault();
    // Here you would typically send the data to your backend
    console.log('Form submitted:', formData);
    // Reset form after submission
    setFormData({ name: '', email: '', password: '' });
  };

  return (
    <div className="registration-form-container">
      <h2>Register</h2>
      <form onSubmit={handleSubmit} className="registration-form">
        <div className="form-group">
          <label htmlFor="name">Name</label>
          <input
            id="name"
            name="name"
            type="text"
            value={formData.name}
            onChange={handleChange}
            required
            data-cy="name-input"
          />
        </div>
        <div className="form-group">
          <label htmlFor="email">Email</label>
          <input
            id="email"
            name="email"
            type="email"
            value={formData.email}
            onChange={handleChange}
            required
            data-cy="email-input"
          />
        </div>
        <div className="form-group">
          <label htmlFor="password">Password</label>
          <input
            id="password"
            name="password"
            type="password"
            value={formData.password}
            onChange={handleChange}
            required
            data-cy="password-input"
          />
        </div>
        <button type="submit" data-cy="submit-button">Register</button>
      </form>
    </div>
  );
};

export default RegistrationForm;
Modify App.css
.registration-form-container {
  max-width: 400px;
  margin: 0 auto;
  padding: 20px;
  border: 1px solid #ccc;
  border-radius: 5px;
  background-color: #f9f9f9;
}

.registration-form-container h2 {
  text-align: center;
  color: #333;
}

.registration-form {
  display: flex;
  flex-direction: column;
}

.form-group {
  margin-bottom: 15px;
}

.form-group label {
  display: block;
  margin-bottom: 5px;
  font-weight: bold;
  color: #555;
}

.form-group input {
  width: 100%;
  padding: 8px;
  border: 1px solid #ddd;
  border-radius: 4px;
  font-size: 16px;
}

button[type="submit"] {
  background-color: #4CAF50;
  color: white;
  padding: 10px 15px;
  border: none;
  border-radius: 4px;
  cursor: pointer;
  font-size: 16px;
  transition: background-color 0.3s ease;
}

button[type="submit"]:hover {
  background-color: #45a049;
}
2)Install Cypress
In your project directory, install Cypress as a development dependency:
npm install cypress –-save-devThis will add Cypress to your project and allow you to run tests.
3)Open Cypress
After installing Cypress, open it for the first time with: npx cypress open- This command launches the Cypress Test Runner and creates a cypress folder in your project. This folder contains default directories like fixtures, support and e2e.
To run Cypress tests, particularly through the Cypress Test Runner, you can use the command npx cypress run. This allows you to execute tests in headless mode, which is useful for continuous integration. The Cypress Test Runner also supports automated video recording and screenshot generation while running tests, providing valuable insights into test execution.
What Cypress Test Runner?
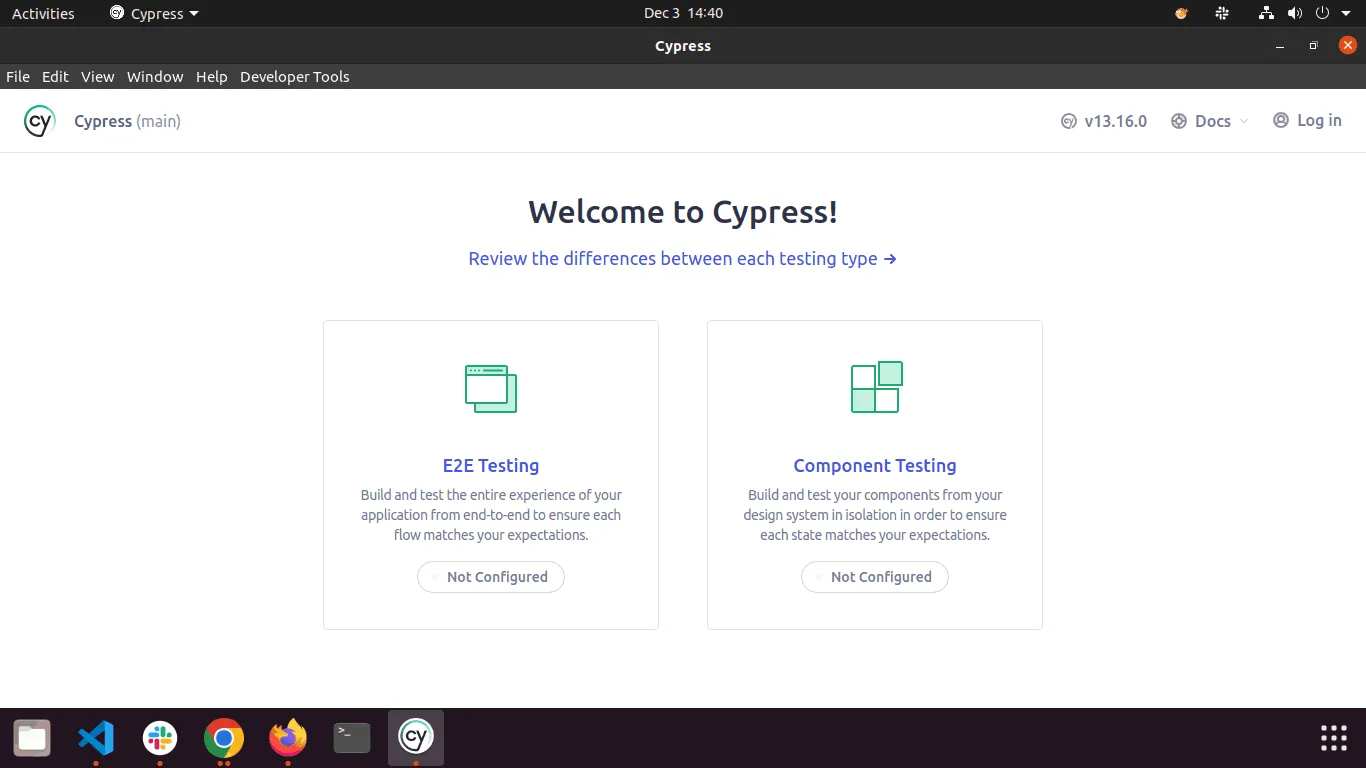
The Cypress Test Runner is a user-friendly tool that lets you run and manage your tests in real-time. It provides a graphical interface where you can see all your test files, choose a browser to run them, and watch the tests execute step by step. It also displays detailed results, logs, and errors to help you debug quickly and efficiently.
Once the Test Runner opens, you'll see two options: E2E Testing and Component Testing. Select E2E Testing to begin testing your application.
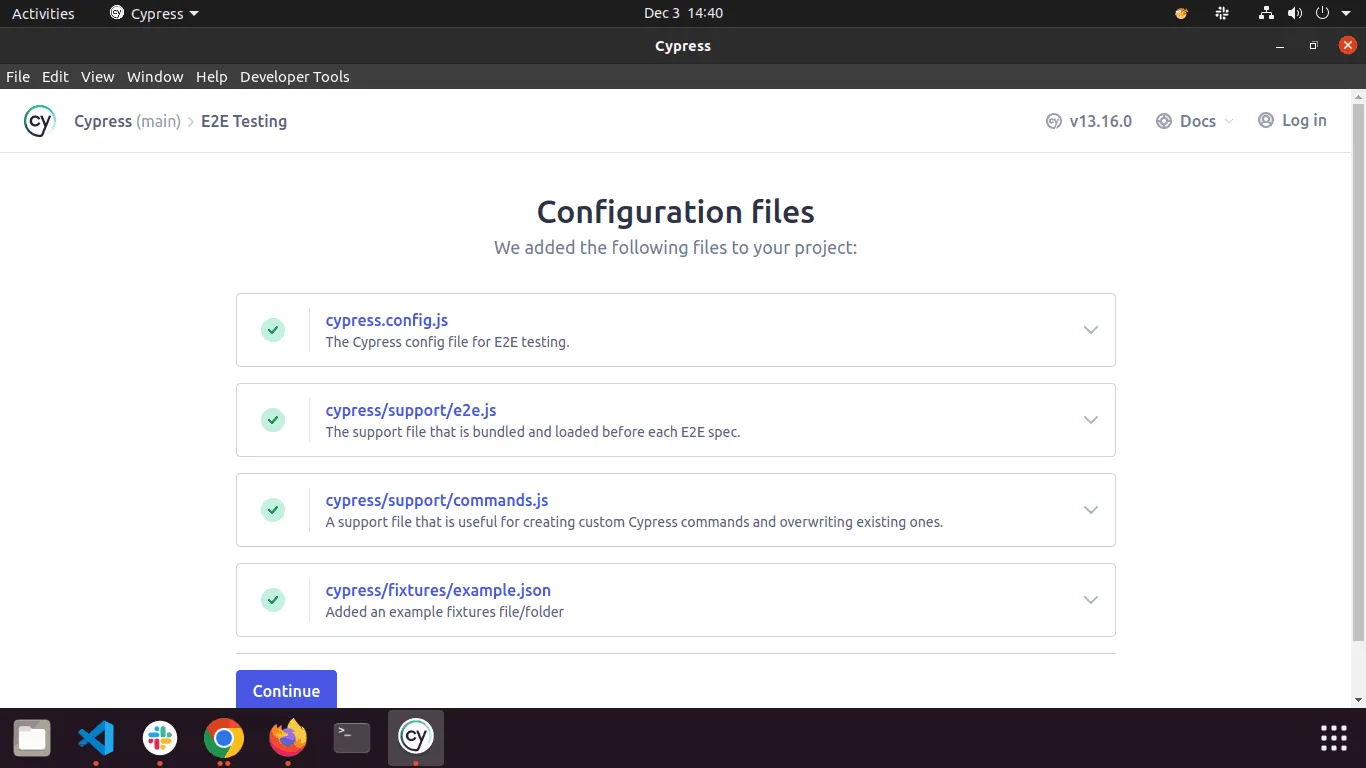
This will open the configure files page, scroll to the bottom and continue, cypress will generate all those files in your project folder
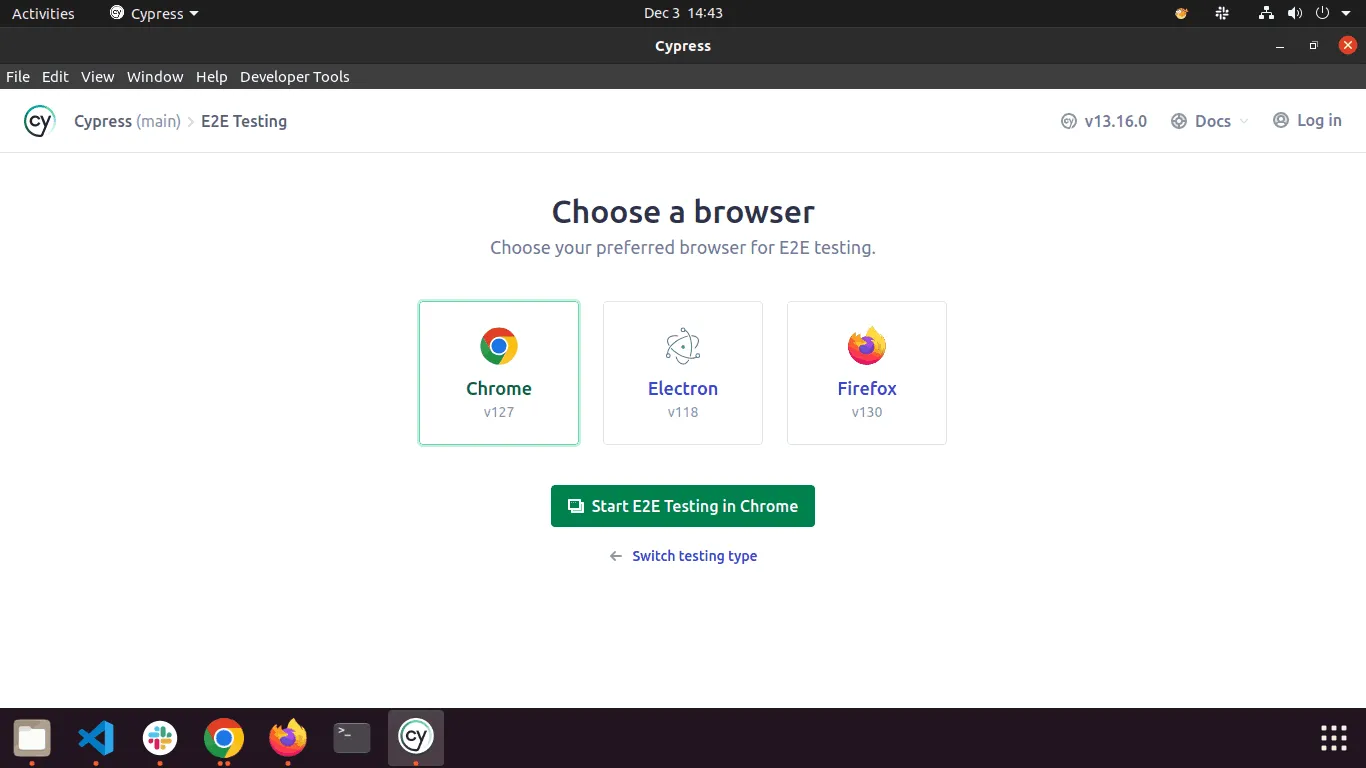
Next, Cypress will take you to the Select Browser page. Here, you can choose the browser in which you want to run your tests. Cypress supports popular browsers like Chrome, Electron, and Firefox. In this scenario, we will proceed with the Chrome browser.
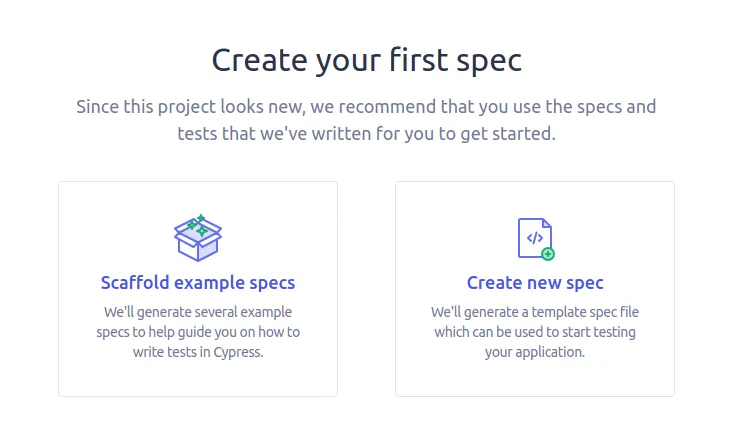
After selecting the browser, the Specifications page will open with two options. Choose Create new spec to begin writing your test.
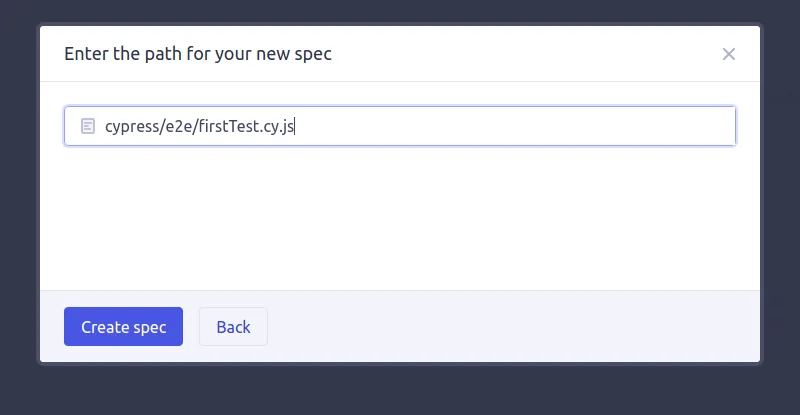
Cypress will then suggest a default path for creating the new specification file. You can use the suggested path or edit it as needed to organize your test files according to your project structure.
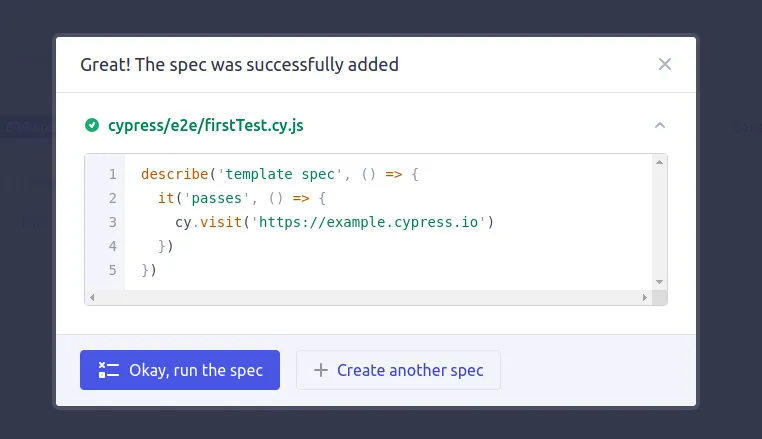
Upon successfully creating the spec test file, you will see a success page. Click on "Okay, run the spec" to begin executing your test.
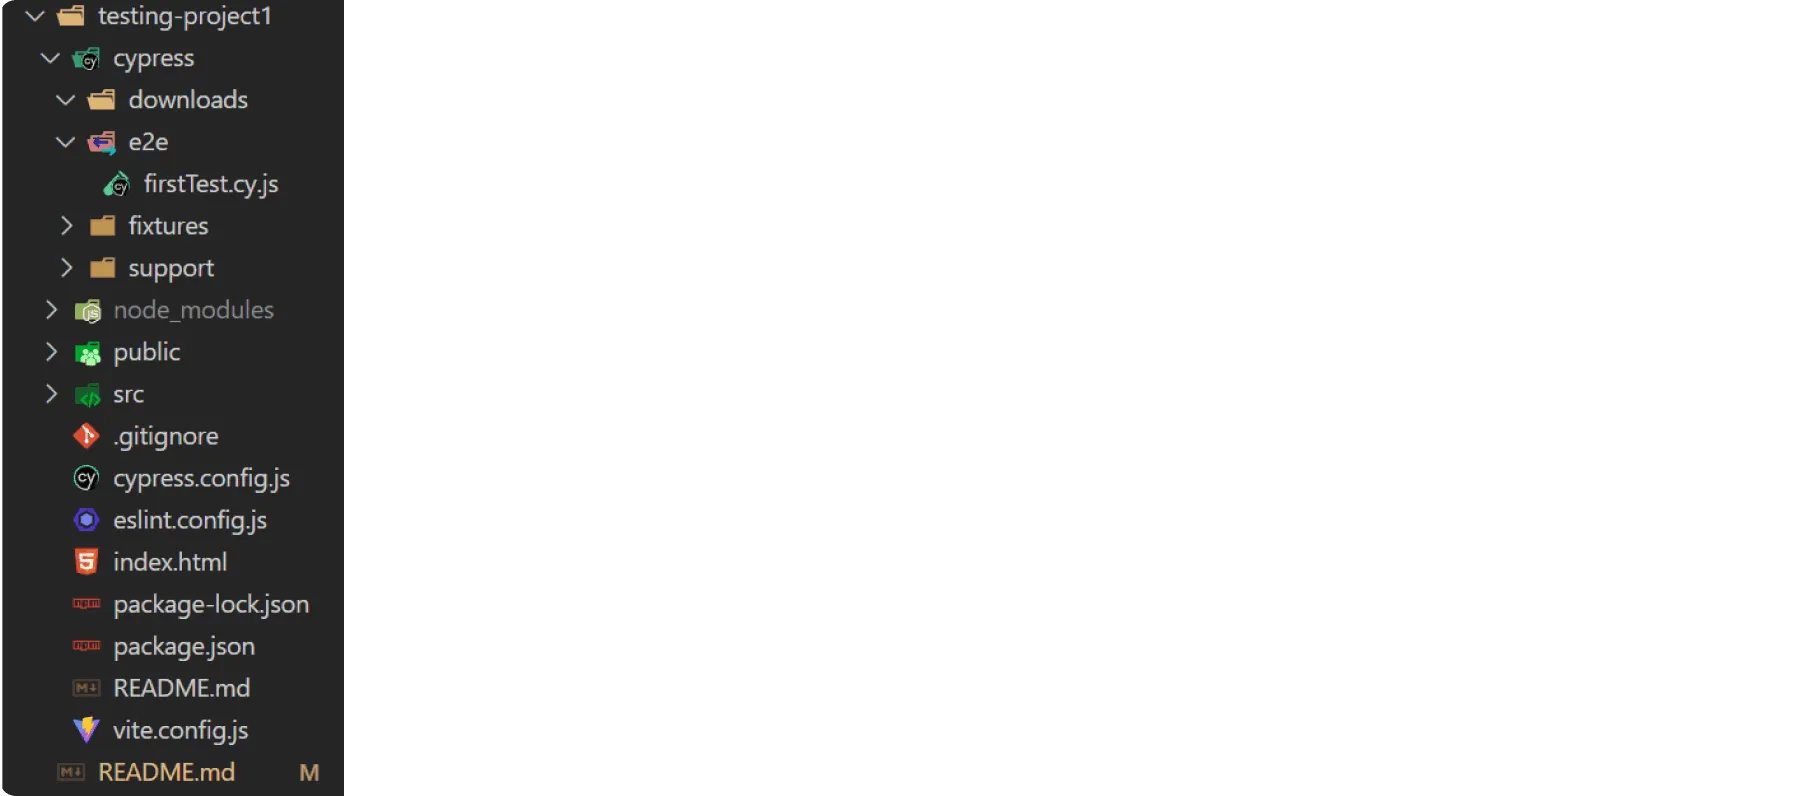
Finally, after completing the configuration, you will see a folder structure similar to this:
Start Writing Your First Cypress Test
Before we begin writing our first test, let's first understand where to write it. We’ll write our test in the firstTest.cy.js file, which we created during the Cypress setup process.
Now, let's take a look at the default code Cypress provides in the test file and break it down:
describe('template spec', () => {
  it('passes', () => {
    cy.visit('https://example.cypress.io')
  })
})
Here’s what the code does:
describe('template spec', () => { }):
This is a test suite, which groups together related tests. In this case, it's named 'template spec'.it('passes', () => { }):
This is an individual test case inside the suite. The string 'passes' is a description of what the test does, which helps identify the test purpose. Currently, it’s a placeholder, indicating the test is expected to pass.cy.visit('https://example.cypress.io'):
This line tells Cypress to open the given URL (https://example.cypress.io) in the browser. It simulates visiting that page in the test. Let's run this default codeIn our case, instead of visiting the default URL (https://example.cypress.io), we will write the URL of our React application that is running locally in the browser. This will allow Cypress to simulate visiting and interacting with our React app during testing.
For example, if your React app is running on http://localhost:5173, you would update the code like this:
cy.visit('http://localhost:5173')
Say Goodbye to Bugs & Glitches Now. Work with a trusted React web development company that knows React inside and out. Implement Cypress-powered E2E testing with us for a smooth and reliable experience. Book your call today.
When you run the default test, we see a page like the one shown below. This default spec is designed to verify that Cypress is installed correctly and is able to run automated tests successfully. It acts as a basic check to ensure everything is set up properly before you begin writing your own tests.
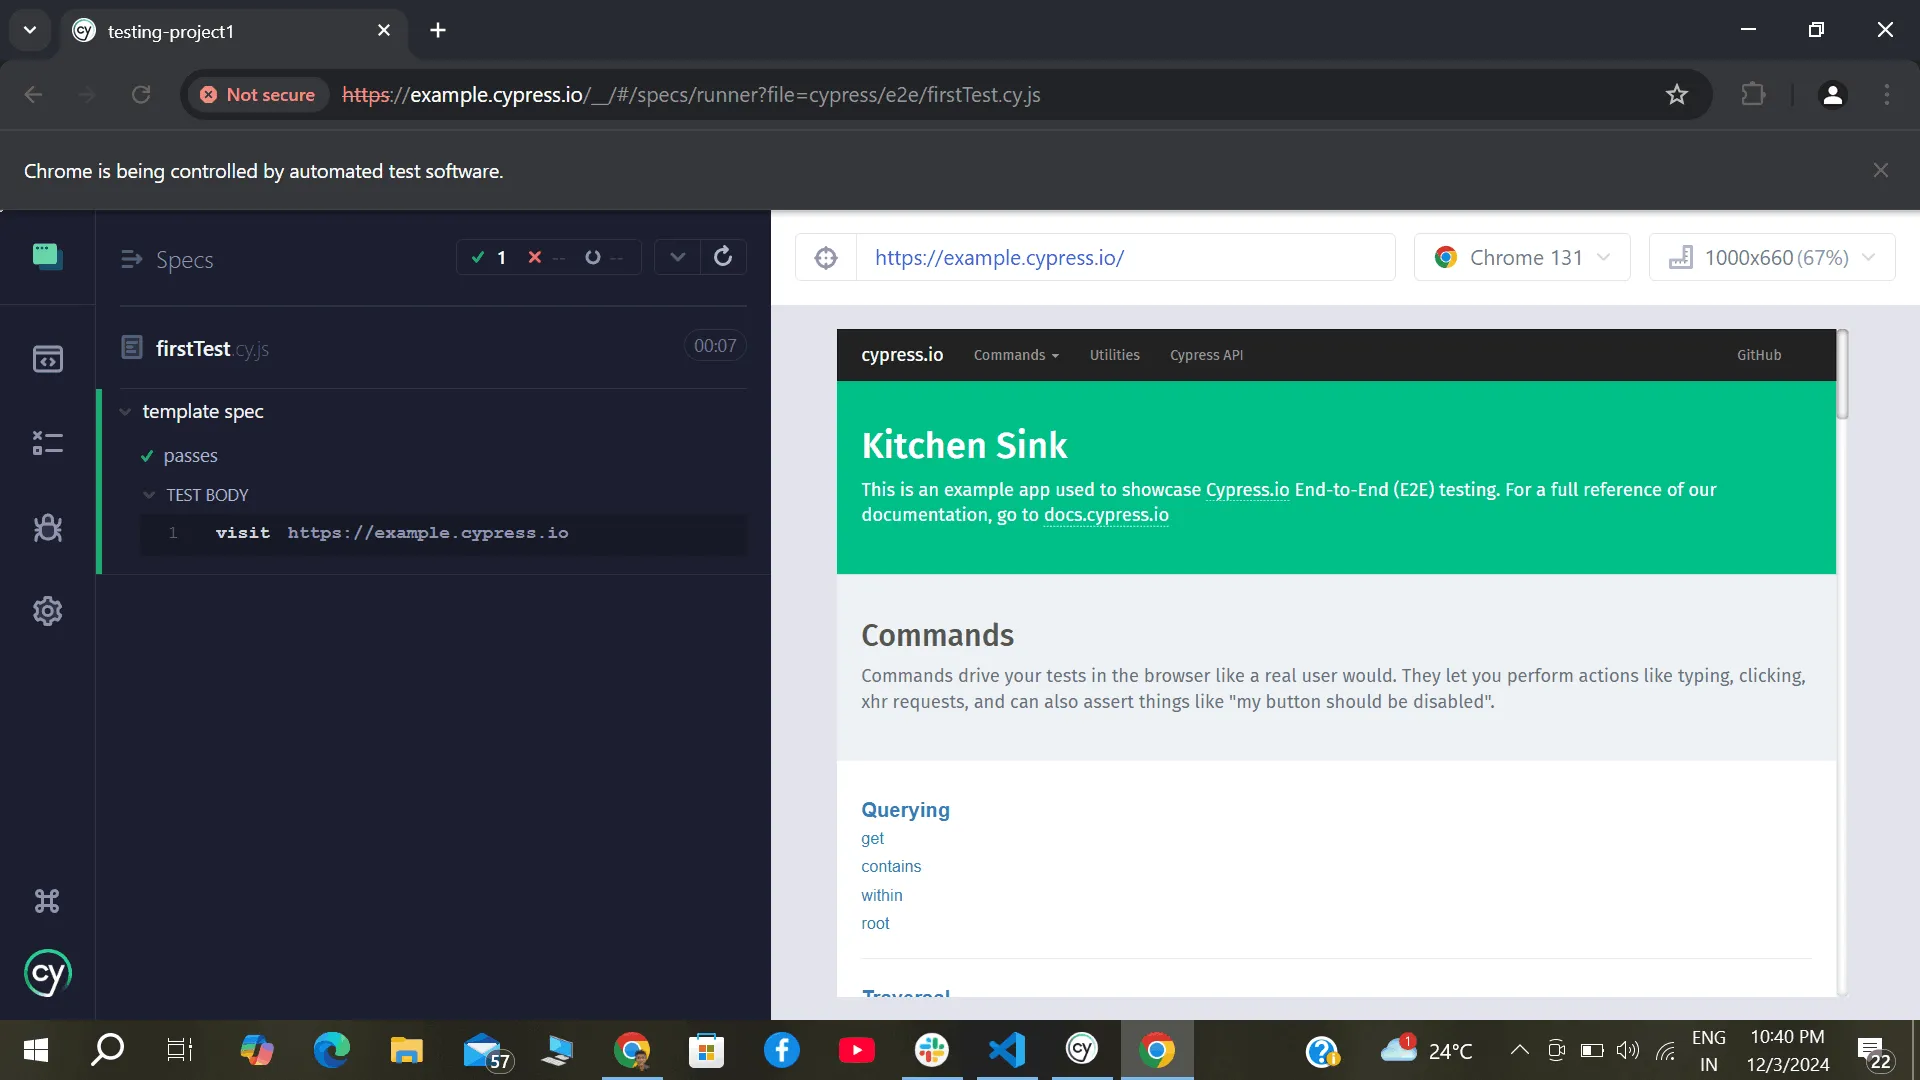
The interface is divided into two main sections: the left panel, where the test steps are listed and updated as they execute, and the right panel, which displays the actual browser window. You can observe each step of the test being executed and watch the browser navigate to https://example.cypress.io as if a real user were visiting the page.
Once the setup is complete, your Cypress framework is ready to use.
Note: To improve the accuracy of your tests, it's highly recommended to run your React Cypress tests on real devices and browsers. Using services like BrowserStack Real Device Cloud ensures that tests are performed under actual user conditions, helping deliver a more reliable and user-friendly experience.
Basic Cypress Commands
Before we begin writing tests for any specific scenario, it’s important to first understand the basic commands provided by Cypress. These commands can be categorized into basic commands (built-in Cypress commands) and custom commands (commands you can define yourself). For now, we’ll focus on the basic commands since we won’t need custom ones in this post.
Here’s a list of some of the most commonly used basic Cypress commands: // Open the specified URL in the browser cy.visit("url");
// Wait for a specified time in milliseconds or until an element is available cy.wait(300);
// Get an element by its CSS selector (e.g., class, id, tag) cy.get("selector");
// Get an element that contains specific text cy.contains("text");
// Click the selected element cy.click();
// Double click the selected element cy.dblclick();
// Get the document object of the page cy.document();
// Type text into an input field cy.type("text");
// Select a specific element by its index from a collection of elements cy.get(".classname").eq(0);
// Check if the element exists on the page cy.should("exist");
// Check for the element's visibility cy.should("be.visible");
// Check if the element is enabled cy.should("be.enabled");
// Get the current URL of the page cy.url();
// Take a screenshot of the page or a selected element cy.screenshot();
// Clear the browser's local storage cy.clearLocalStorage();
These commands form the foundation of Cypress testing. They are used to write test scripts that simulate user interactions and verify application behavior. As you continue learning, you’ll get familiar with more advanced commands, but mastering these basic ones is the first step toward writing effective end-to-end tests.
For more information on these and other basic commands, you can refer to this.
Test a Registration Form with Cypress
Let’s now look at our example of writing E2E tests for a registration form. In this case, we’ll test the visibility of the form, submitting data, and validation checks.
Cypress allows developers to control and wait for specific network requests, enabling more accurate and efficient testing processes. This feature assists in handling asynchronous behavior, ensuring tests are robust and reducing potential errors during application testing.
Modify your firstTest.cy.js spec file and add these test cases.
describe('Registration Form', () => {

    // This hook runs before each test case to ensure we're starting with a fresh page
    beforeEach(() => {
        cy.visit('http://localhost:5173/') // Visit the registration form page
    });

    // Test case to check if the registration form is visible
    it('displays the registration form', () => {
        cy.get('.registration-form-container').should('be.visible'); // Check if the form container is visible
        cy.get('[data-cy=name-input]').should('be.visible'); // Ensure the name input field is visible
        cy.get('[data-cy=email-input]').should('be.visible'); // Ensure the email input field is visible
        cy.get('[data-cy=password-input]').should('be.visible'); // Ensure the password input field is visible
        cy.get('[data-cy=submit-button]').should('be.visible'); // Ensure the submit button is visible
    });

    // Test case to ensure users can enter data into the registration form
    it('allows entering registration information', () => {
        cy.get('[data-cy=name-input]').type('John Doe'); // Type into the name input field
        cy.get('[data-cy=email-input]').type('john@example.com'); // Type into the email input field
        cy.get('[data-cy=password-input]').type('password123'); // Type into the password input field

        // Verify that the inputs have the correct values after typing
        cy.get('[data-cy=name-input]').should('have.value', 'John Doe');
        cy.get('[data-cy=email-input]').should('have.value', 'john@example.com');
        cy.get('[data-cy=password-input]').should('have.value', 'password123');
    });

    // Test case to check form submission with valid data
    it('submits the form with valid data', () => {
        cy.get('[data-cy=name-input]').type('Jane Smith'); // Type name in the input field
        cy.get('[data-cy=email-input]').type('jane@example.com'); // Type email in the input field
        cy.get('[data-cy=password-input]').type('securepass'); // Type password in the input field

        cy.get('form').submit(); // Submit the form

        // After submission, check that the form fields are cleared
        cy.get('[data-cy=name-input]').should('have.value', '');
        cy.get('[data-cy=email-input]').should('have.value', '');
        cy.get('[data-cy=password-input]').should('have.value', '');
    });

    // Test case to verify that all fields are required and validate HTML5 constraints
    it('requires all fields to be filled', () => {
        cy.get('[data-cy=submit-button]').click(); // Try submitting the form without filling in any fields

        // Check for HTML5 validation messages for each field
        cy.get('[data-cy=name-input]').then($el => {
            expect($el[0].validationMessage).to.not.be.empty; // Ensure there's a validation message for the name field
        });
        cy.get('[data-cy=email-input]').then($el => {
            expect($el[0].validationMessage).to.not.be.empty; // Ensure there's a validation message for the email field
        });
        cy.get('[data-cy=password-input]').then($el => {
            expect($el[0].validationMessage).to.not.be.empty; // Ensure there's a validation message for the password field
        });
    });

    // Screenshot API allows us to capture the current state of the application during test execution.
    it('takes a screenshot', () => {
        cy.screenshot();
    });

});
Key Commands in Action:
cy.visit(): Opens the URL of the registration page.
cy.get(): Selects elements like input fields, buttons, and form containers.
cy.type(): Simulates typing in the input fields.
cy.submit(): Submits the form.
cy.should(): Asserts various conditions, like visibility or input values.
cy.click(): Simulates clicking a button.
By using these basic Cypress commands, we can easily automate the testing of the registration form's functionality and ensure the form behaves as expected.
Explanation of Each Test:
After running the tests in Cypress, the Test Runner provides detailed feedback for each test case. If a test passes successfully, a green checkmark will appear next to the test, indicating that everything has passed without any issues. The Test Runner also displays detailed information for each test case, which is useful for debugging and understanding the flow of the test.

1) Visibility Test for Registration Form Elements
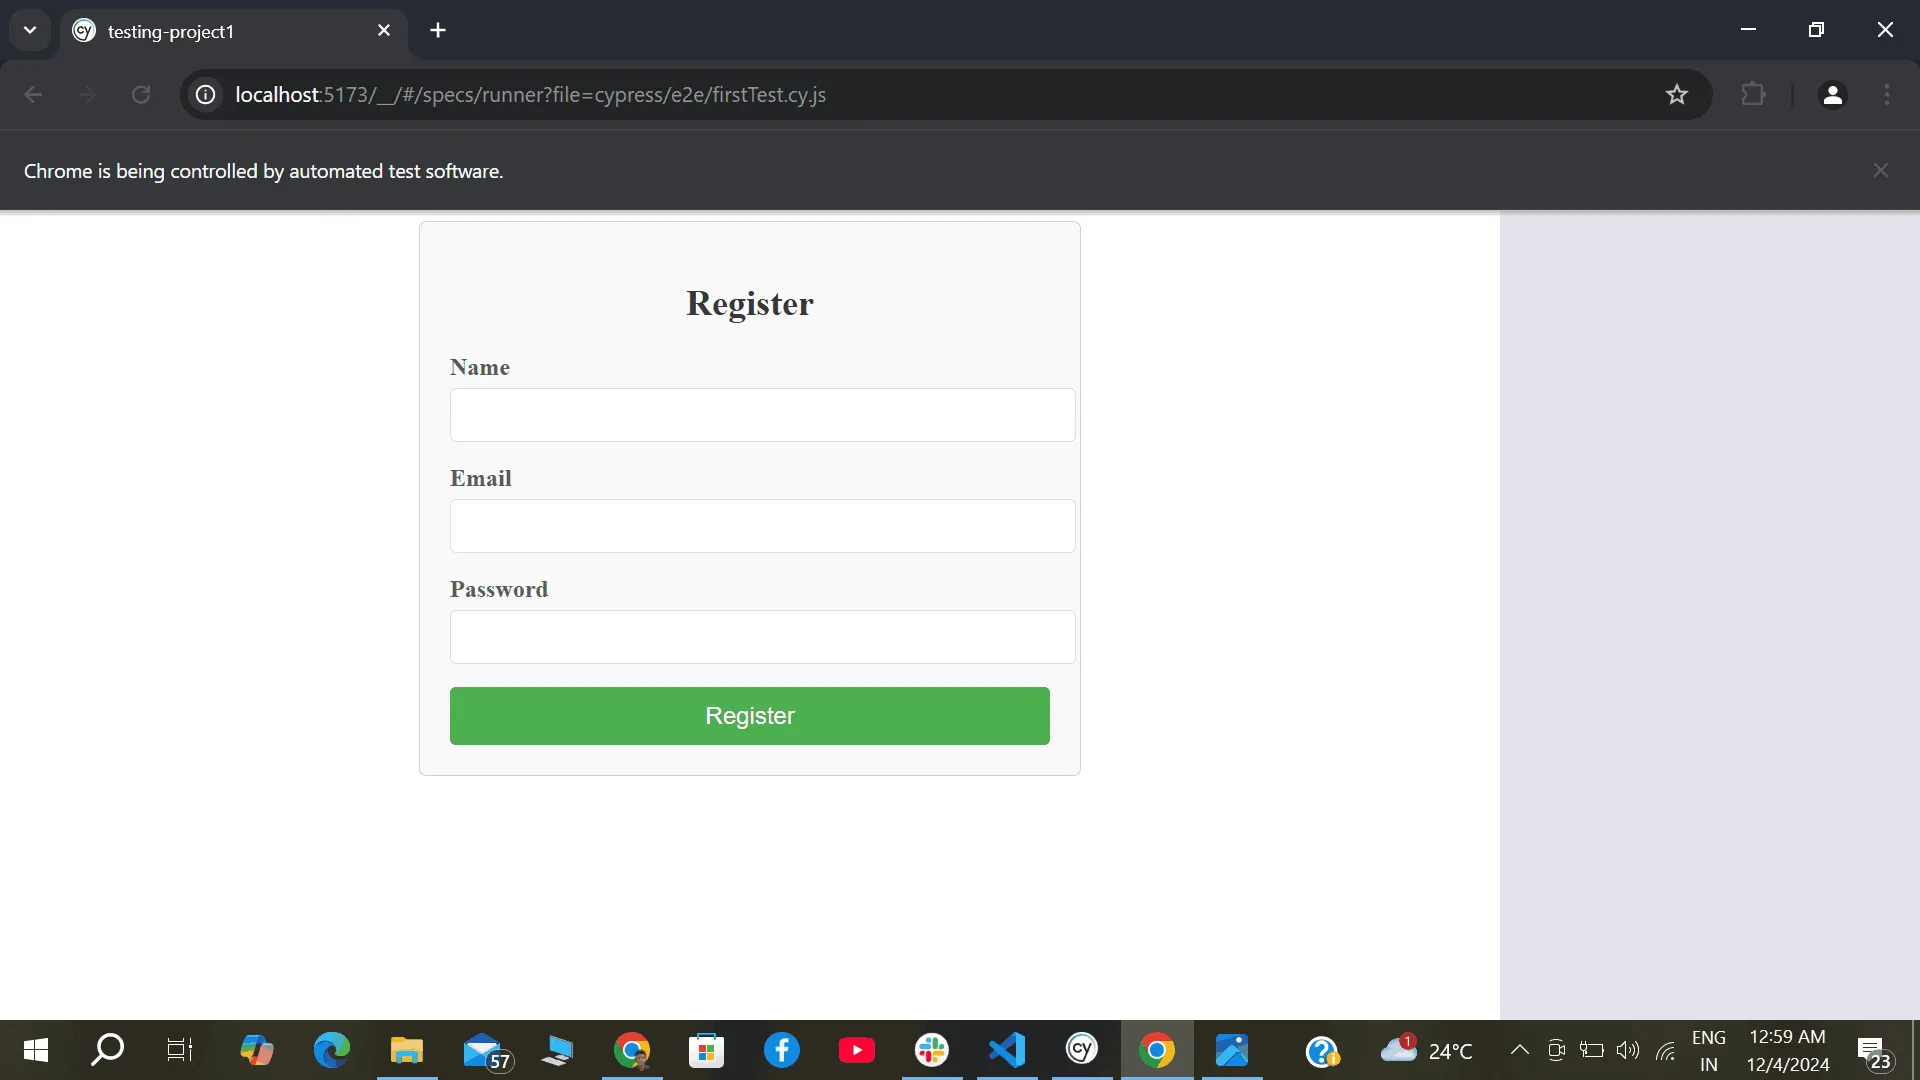
The test checks if all key elements, such as the registration form container, input fields for name, email, and password, and the submit button, are visible. On success, users will see the complete form displayed on the screen, ready for interaction. The form should appear without any missing or broken elements.
UI Flow: The user sees the form with clearly labeled input fields for their name, email, and password, along with a submit button below.
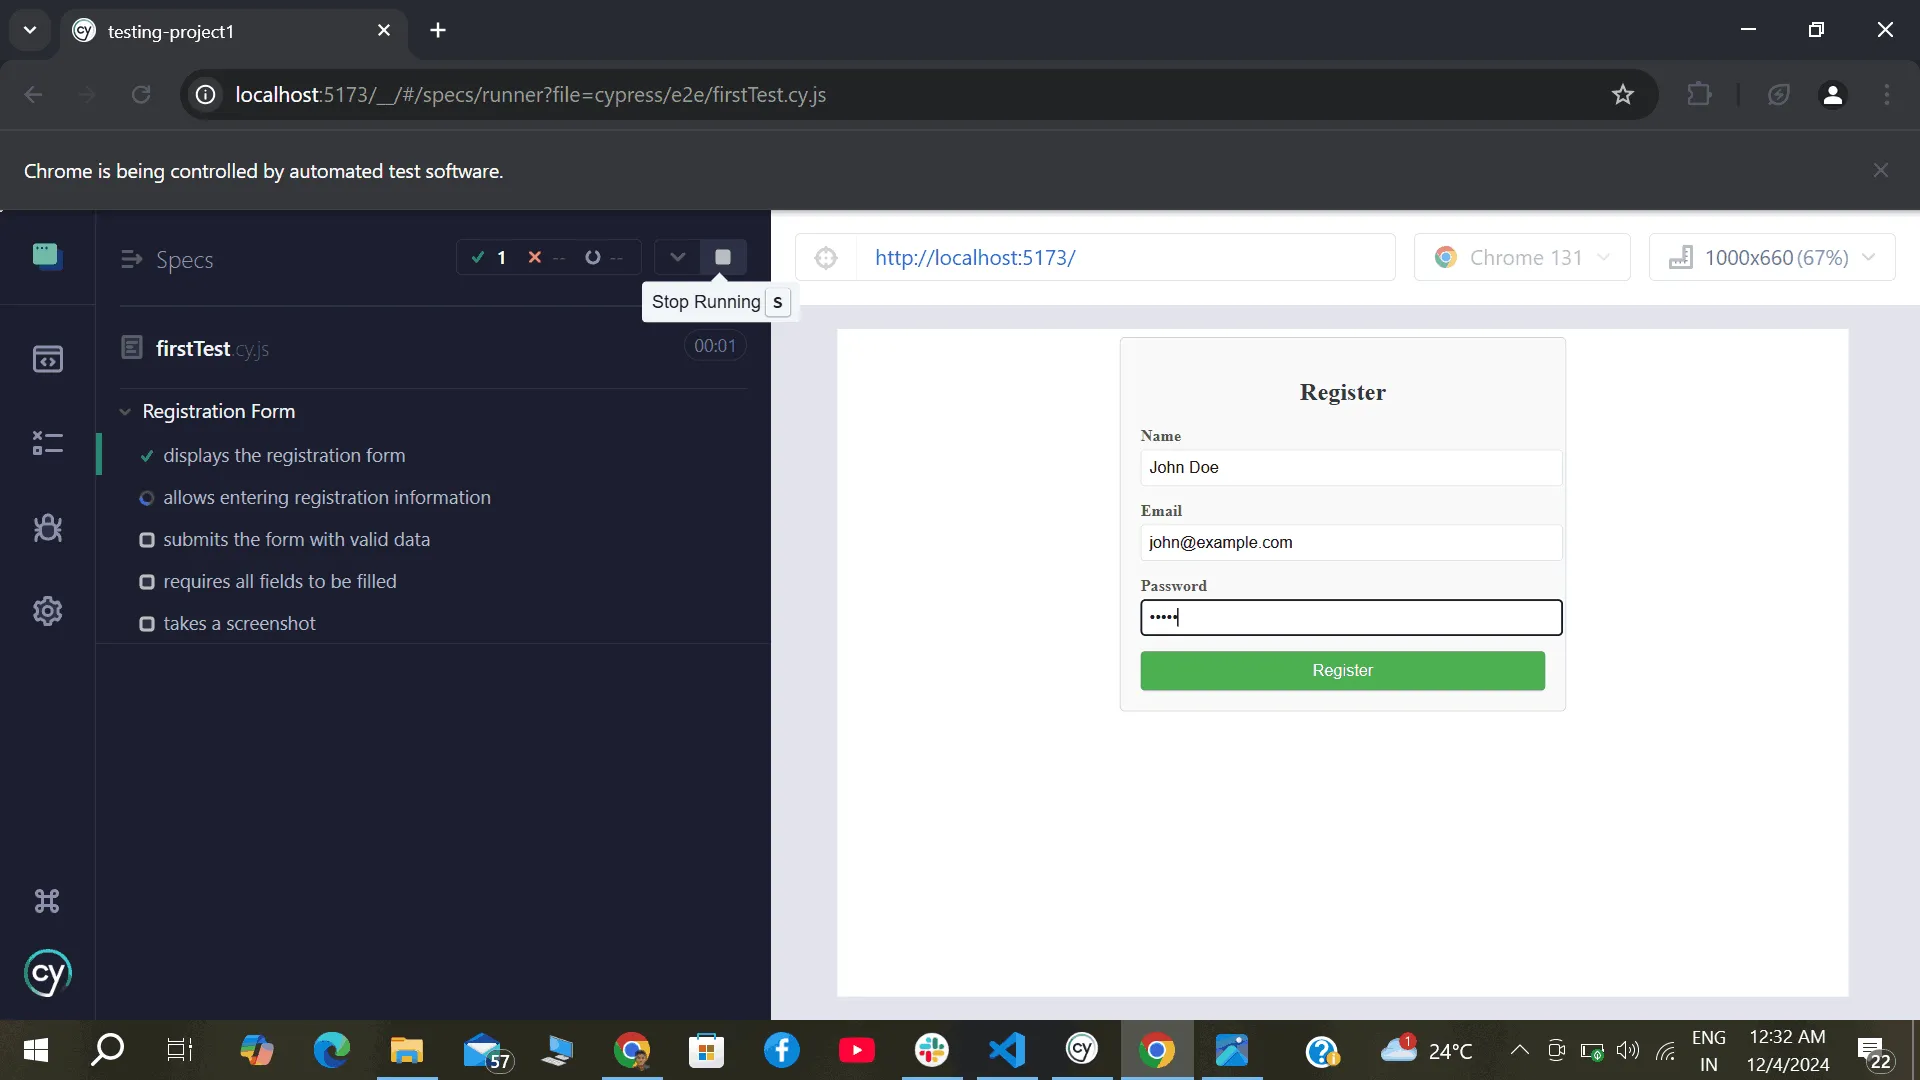
2) User Input Simulation Test for Registration Form
The test simulates typing into the form’s input fields. Once the data is typed in, Cypress checks that the input values reflect what was entered. On success, the user will see their input (e.g., "John Doe," "john@example.com," "password123") populated in the corresponding fields on the UI.
UI Flow: As the user types, they will see the values appearing inside the respective input fields, giving immediate feedback that their input is being captured correctly.
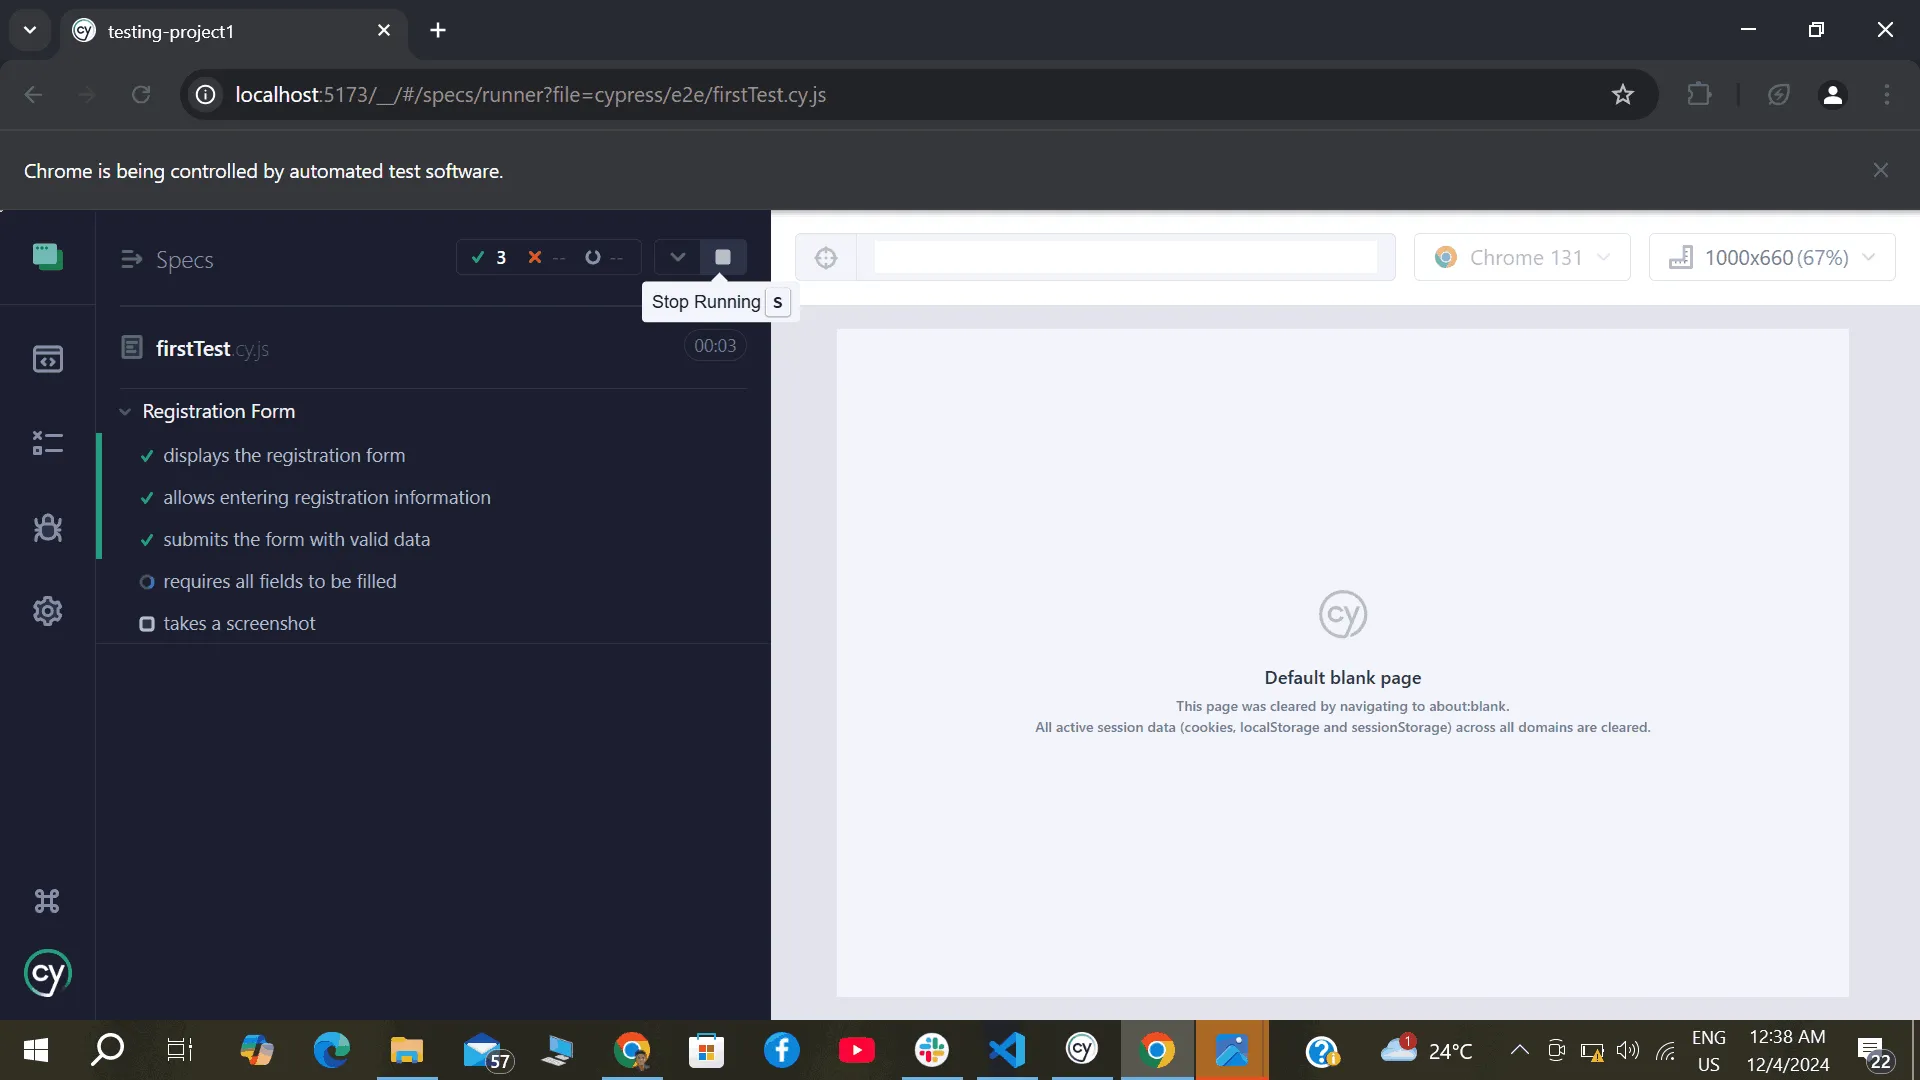
3)Successful Form Submission Test
After filling out the form, the test simulates a form submission. Upon successful submission, the form fields should be cleared. On success, the user will be redirected, or the form will reset, showing empty fields. This indicates that the form has been processed correctly.
UI Flow: After hitting the submit button, the user would either see a confirmation message (e.g., "Registration successful!") or an empty form if the UI is set to reset upon submission.
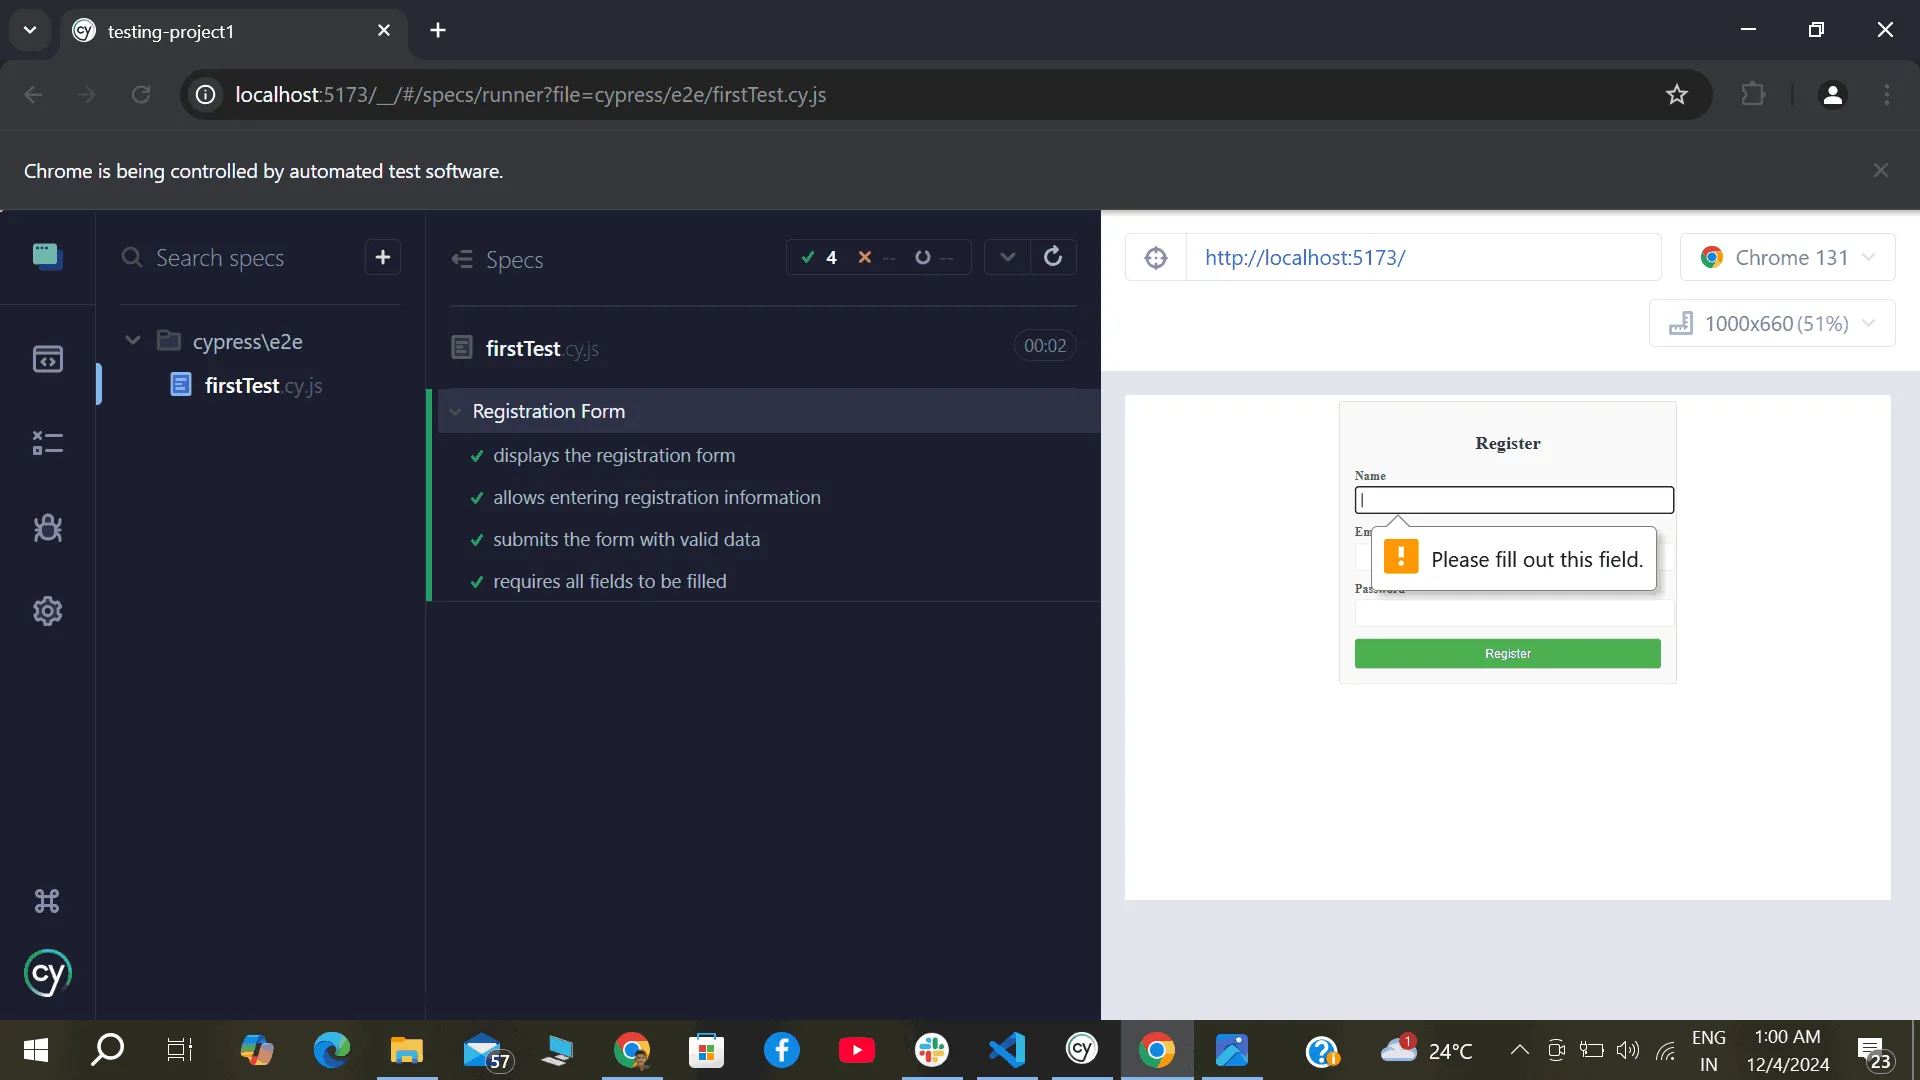
4)Field Validation for Empty Input Handling
This test checks if the form prevents submission when any required fields are empty. Upon clicking the submit button without filling out the required fields, the UI will display validation messages (e.g., "This field is required"). On success, the form will highlight the missing fields and show the appropriate validation message.
UI Flow: The user would see error messages beside the input fields that were left empty, informing them that the fields are mandatory. This would stop them from proceeding until the fields are filled.
5) Taking a Screenshot with Cypress
In this test, we are utilizing the cy.screenshot() command, which is built into Cypress and allows us to capture the current state of the application during test execution. Screenshots are incredibly useful for visual debugging, documentation, and tracking changes in the UI over time.
What Happens When a Cypress Test Fails?
When a Cypress test fails, it provides a detailed output to help developers debug efficiently. Planning and prioritizing testing efforts within the framework of the automation pyramid is crucial. Effective end-to-end testing enhances the overall health of an application by validating its performance at various levels, thereby minimizing testing efforts by detecting bugs early and reducing redundancy in tests. Let’s look at a test case scenario involving a registration form and understand how to interpret a failure.
In the test, the following code validates user input:
it('allows entering registration information', () => {
cy.get('[data-cy=name-input]').type('Jo Doe'); // Simulates typing a name
cy.get('[data-cy=email-input]').type('john@example.com'); // Simulates typing an email
cy.get('[data-cy=password-input]').type('password123'); // Simulates typing a password
// Checks if input values match the expected values
cy.get('[data-cy=name-input]').should('have.value', 'John Doe');
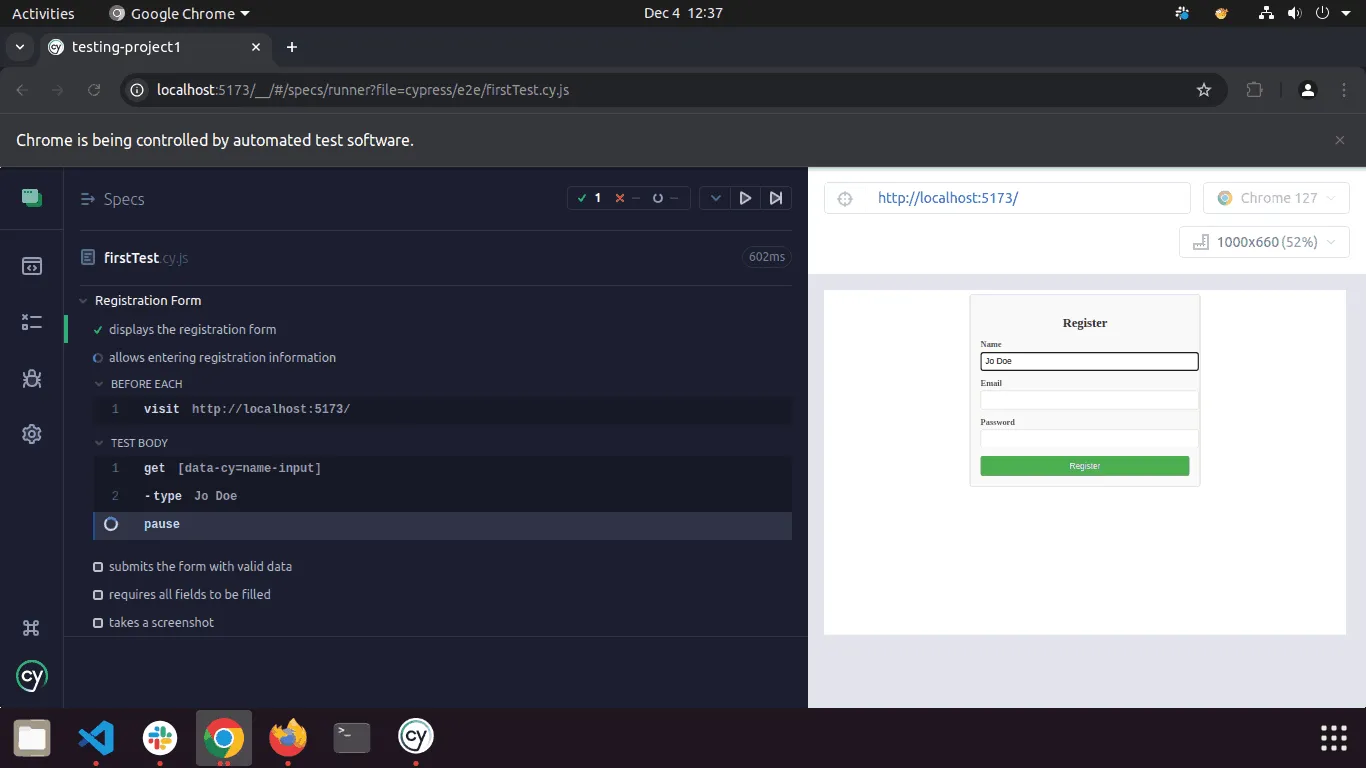
});When running this Cypress test, the page displays the detailed error information:
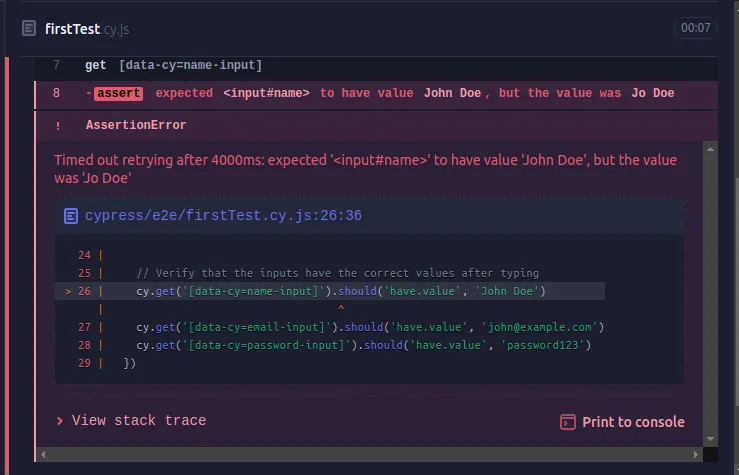
AssertionError: expected '< input#name>' to have value 'John Doe', but the value was 'Jo Doe' This indicates that the typed value “Jo Doe” does not match the expected value “John Doe”. Cypress also provides step-by-step logs, showing exactly where the failure occurred, along with a snapshot of the DOM to help visualize the state of the form.
How to Fix the Issue
The failure in this scenario was caused by a typo in the input value (Jo Doe instead of John Doe). To resolve it, correct the input value in the test:
cy.get('[data-cy=name-input]').type('John Doe')Re-running the test should now pass.
Debugging and Troubleshooting
When running tests with Cypress, debugging and troubleshooting are essential to ensure the stability and reliability of your application. Cypress provides a variety of tools to make this process smooth and effective. In this post, we will explore how to debug and troubleshoot Cypress tests using features like cy.debug(), cy.pause(), the Cypress Test Runner, and the Cypress Dashboard.
Understanding Cypress Debugging Features
1) Cypress Test Runner:
The Cypress Test Runner offers real-time feedback on the tests being executed. It allows you to see each test step and inspect the DOM at various points during the test. This provides valuable insight into what went wrong when a test failed. For example, in the following test:
it('allows entering registration information', () => {
  cy.get('[data-cy=name-input]').type('Jo Doe') // Simulate user input
  cy.get('[data-cy=email-input]').type('john@example.com')
  cy.get('[data-cy=password-input]').type('password123')

  // Check if values match
  cy.get('[data-cy=name-input]').should('have.value', 'John Doe') // This will fail if 'Jo Doe' is typed
})
If the assertion fails (as it will when "Jo Doe" does not match "John Doe"), Cypress will highlight the failure and show the current state of the form in the Test Runner. You can visually inspect the form to spot discrepancies, like missing or incorrect values.
cy.debug():
The cy.debug() command helps log the current state of a test at a specific point. For example, you can add cy.debug() after entering text into an input field to view the current state:
cy.get('[data-cy=name-input]').type('Jo Doe')
cy.debug() // Outputs the current state of the test to the console
This will print the state of the command to the console, allowing you to analyze it before the test continues.
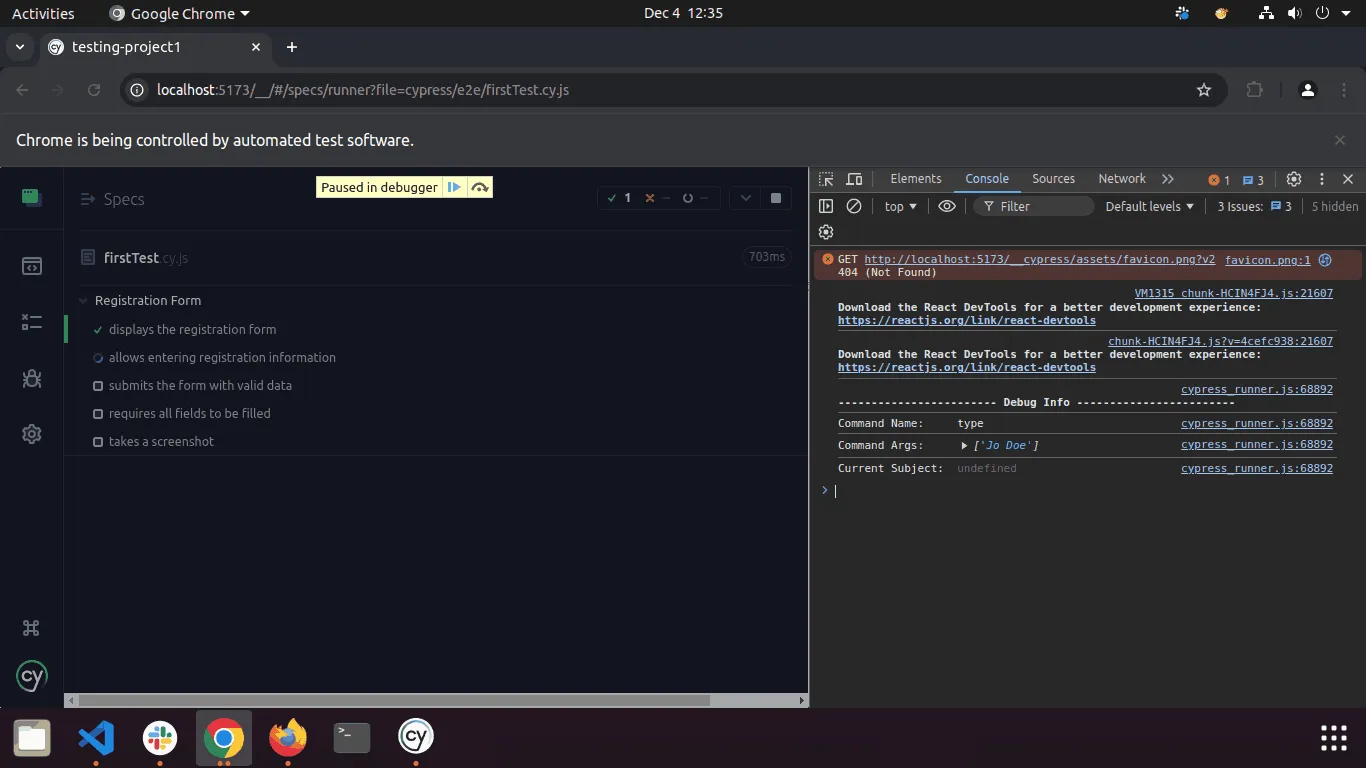
cy.pause():
Sometimes, it's useful to pause the test execution to manually inspect the page and interact with it. The cy.pause() command pauses the test at the point where it's called:
cy.get('[data-cy=name-input]').type('Jo Doe')
cy.pause() // Pauses the test, allowing manual inspection
After adding cy.pause(), Cypress will halt the test at that point, and you can inspect the elements on the page, interact with them, or step through the test manually.
Cypress Dashboard for Test Analysis
For more advanced debugging, the Cypress Dashboard provides a comprehensive view of test runs, including video recordings, screenshots, and detailed logs. This feature is especially useful when running tests across multiple environments or as part of a CI/CD pipeline.
Additional Features to Aid Debugging
Time Travel :
Cypress supports time travel, which allows you to go back and forth in the execution flow, enabling you to inspect each step of your test and see how the application evolves.
When you use Cypress commands in your tests, the Test Runner automatically captures a snapshot of the application’s state at each step. You can then hover over a command in the Command Log to see the state of your application at that specific point.
cy.get('[data-cy=name-input]').type('Jo Doe')
cy.get('[data-cy=email-input]').type('john@example.com')
// Time travel allows you to review each interaction step-by-step
cy.get('[data-cy=name-input]').should('have.value', 'Jo Doe')Screenshots:
Cypress can automatically capture screenshots when a test fails. This helps visualize the point of failure.
it('takes a screenshot on failure', () => {
  cy.get('[data-cy=name-input]').type('John Doe')
  cy.get('[data-cy=submit-button]').click()
  // Automatically takes a screenshot if the test fails
  cy.screenshot()
})
Command Logging
Cypress logs every command it executes, showing detailed information about actions and results. This is useful for debugging and understanding test flow.
cy.get('[data-cy=name-input]')
  .type('John Doe')
  .should('have.value', 'John Doe')
// Logs each action in the command log for transparency
Advanced Cypress Features
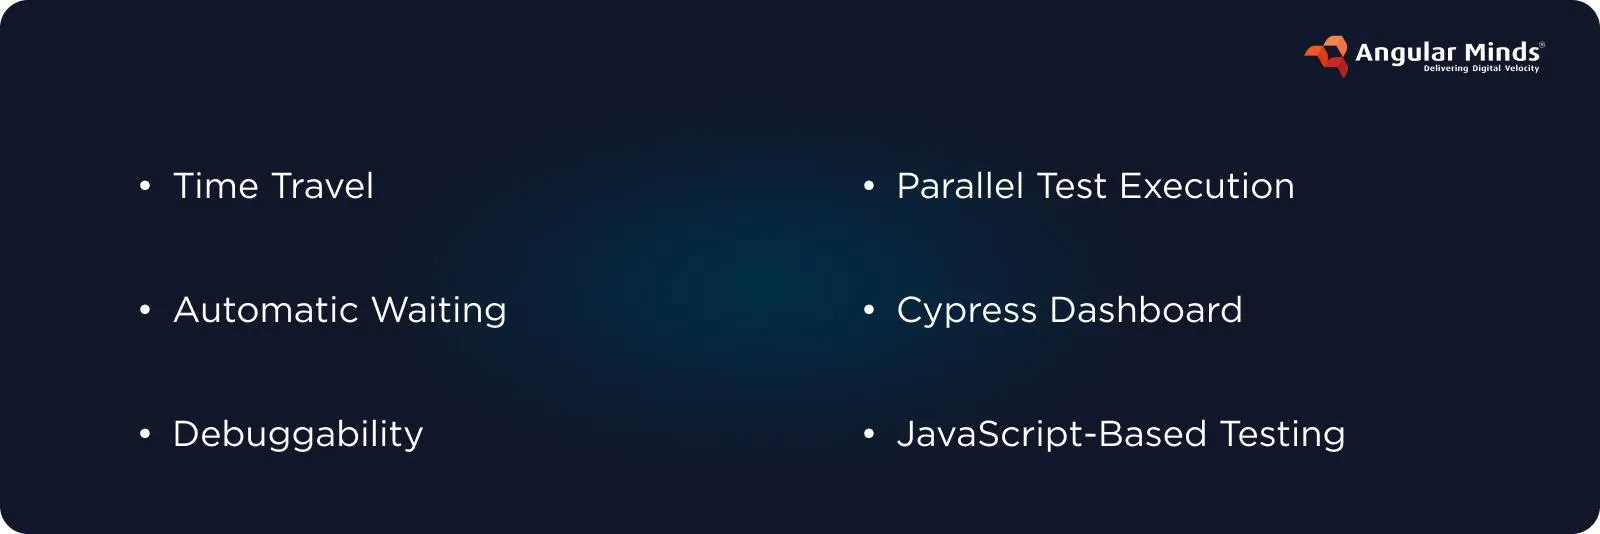
Cypress is an incredibly powerful testing framework, packed with advanced features designed to make testing both efficient and accurate. Let’s dive into some of its standout functionalities:
Time Travel
One of Cypress’ most exciting features is "time travel." It allows you to visually step through your test execution, making it easy to track and debug. By simply hovering over commands in the Test Runner, you can see your application’s state at any given moment, offering a much clearer picture of how things are unfolding and where issues might arise.
Automatic Waiting
Gone are the days of manually adding waits for elements to load or HTTP requests to finish. With Cypress, everything is handled automatically. It ensures that DOM elements are fully loaded, animations are completed, and HTTP requests are finished before moving to the next step in your test, making your tests more reliable and stable.
Debuggability
Cypress makes debugging a breeze by integrating directly with developer tools. You can pause tests, inspect application states, and dig deeper into problems with simple commands like cy.debug() or cy.pause(). This gives you more control and helps you pinpoint issues more efficiently.
Parallel Test Execution
When it comes to speeding up your testing process, parallel test execution is a game-changer. Cypress can distribute your tests across multiple machines, reducing execution time significantly while still maintaining full test coverage.
Cypress Dashboard
The Cypress Dashboard serves as a centralized hub for managing and monitoring your test runs. It provides detailed logs, screenshots, and videos of test failures, streamlining collaboration among teams and making it easier to resolve issues quickly.
JavaScript-Based Testing
Tests in Cypress are written in JavaScript, and they run directly in the browser. This mirrors the real-world environment your users experience, giving you a more accurate representation of how your application behaves in production.
These advanced features make Cypress an invaluable tool for both developers and QA teams looking to optimize their testing workflows and ensure application reliability.
Best Practices and Common Pitfalls in Cypress Testing
Writing effective Cypress tests isn’t just about using its features—it’s about adopting the right practices to ensure reliability, maintainability, and clarity. Here are some essential tips:
Keep Tests Independent
One of the most important principles is to keep your tests independent. They shouldn’t rely on the results or state of other tests. This isolation helps make debugging simpler because you’ll know exactly where a failure is happening.
Focus on Specific Functionality
Instead of testing too many things at once, aim to focus each test on a single piece of functionality. This makes your tests faster to run and much easier to troubleshoot when issues arise.
Use Page Objects
A key best practice in Cypress is using page objects. This pattern centralizes selectors and reusable functions, making your tests more maintainable and DRY (Don’t Repeat Yourself). As your application grows, this helps ensure your tests remain clean and easy to update.
Keep Tests Simple
Complex scenarios should be broken down into smaller, manageable cases. Keeping your tests simple ensures they run faster and are easier to understand and modify when necessary.
Add Comments
Comments are vital in explaining why certain sections of your test code exist. This will make it much easier for others (or even your future self) to pick up where you left off and understand the intent behind each test case.
Review and Refine Regularly
As with any tool or practice, regular reviews are crucial. As Cypress evolves, so should your testing practices. Stay on top of changes to ensure your end-to-end tests remain relevant and effective.
Avoid Pitfalls
To ensure your tests are as reliable as possible, avoid common pitfalls like making tests too interdependent or writing unclear code. Instead, aim for clear, focused tests that are easy to maintain and troubleshoot.
Conclusion and Resources
Cypress is an incredibly robust tool for end-to-end testing, especially when working with modern applications like those built with React. Its advanced features like time travel, automatic waiting, and debuggability make the testing process much smoother and more reliable. When used alongside best practices, Cypress helps you create tests that are not only reliable but also easy to maintain.
The Cypress Dashboard is another major bonus. It allows you to manage and monitor your tests from a central location, providing important insights into your test runs. By reviewing test results and improving test coverage, you can reduce execution time and ensure your application remains in top shape. With Cypress, your testing is in good hands—ensuring better quality and a smoother workflow for your development team.
What is the Difference Between E2E and Component Testing?
End-to-End (E2E) testing and component testing are crucial methodologies in ensuring the functionality and reliability of a React.js application, but they target different aspects of the software. E2E testing validates the entire user journey by simulating real-world interactions, such as filling out forms, navigating between pages, or interacting with APIs. It ensures that all components, APIs, and services work cohesively, providing confidence that the application meets user expectations.
Component testing, on the other hand, focuses on the functionality of individual React components in isolation. It tests specific behaviors, such as rendering a button with the correct label or triggering events like clicks. This method helps developers identify and fix issues at the granular level before they impact the larger application.
By combining E2E and component testing, you can ensure a seamless user experience while maintaining robust, bug-free components. This dual approach enhances software quality and builds trust in your testing strategy.
What is the Cypress Test Runner?
The Cypress Test Runner is a graphical user interface (GUI) that allows developers to create, run, and manage Cypress tests. It provides an interactive way to write and debug tests, making it easier to develop and maintain a robust test suite.
The Cypress Test Runner offers several features, including:
A code editor for writing tests
A test runner for executing tests
A debugger for stepping through tests and identifying issues
A dashboard for viewing test results and analytics
With the Cypress Test Runner, you can see your tests execute in real-time, providing immediate feedback and detailed logs. This interactive test runner is invaluable for debugging, as it allows you to inspect the state of your application at each step of the test. By leveraging the Cypress Test Runner, you can streamline your testing process and ensure your test suite is both comprehensive and reliable.
Creating a Test Suite
A test suite is a collection of tests designed to verify a specific feature or functionality of an application. In Cypress, creating a test suite involves organizing individual tests into a logical structure, making it easier to manage and execute them.
To create a test suite in Cypress, follow these steps:
Create a New File or Folder: Start by creating a new file or folder in your Cypress project directory. This will house your test suite.
Write Individual Tests: Use the Cypress API to write individual tests. Each test should focus on a specific aspect of the feature you are testing.
Organize Tests: Use describe blocks to group related tests together and it blocks to define individual test cases. This structure helps in maintaining clarity and organization.
Execute Tests: Use the Cypress Test Runner to execute your test suite. The test runner provides real-time feedback and detailed logs, making it easier to identify and fix issues.
A well-structured test suite should cover various scenarios and edge cases, ensuring comprehensive test coverage. By organizing your tests logically, you can maintain and update them more efficiently as your application evolves.
Interacting With React Components
Cypress provides a robust framework for interacting with React components, allowing developers to write tests that simulate real user interactions. This includes actions like clicking buttons, filling out forms, and navigating through the application.
To interact with React components in Cypress, you can use the following commands:
cy.get(): Retrieves a React component by its selector. For example, cy.get('[data-cy=submit-button]') selects the submit button.
cy.contains(): Retrieves a React component by its text content. For example, cy.contains('Submit') selects a button with the text “Submit”.
cy.click(): Simulates a click event on a React component. For example, cy.get('[data-cy=submit-button]').click() clicks the submit button.
cy.type(): Simulates a typing event on a React component. For example, cy.get('[data-cy=name-input]').type('John Doe') types “John Doe” into the name input field.
These commands allow you to write tests that mimic user interactions, ensuring that your React components behave as expected. By leveraging Cypress’s powerful API, you can create comprehensive tests that validate the functionality and reliability of your React application.

Related articles
AI Integration in React Applications: Building Intelligent UIs with TensorFlow.js and Brain.js